Installation Wizard
When ownCloud prerequisites are fulfilled and all ownCloud files are installed on the server, the last step to complete the installation is running the Installation Wizard. Open your Web browser to your new ownCloud installation.
- If you are installing ownCloud on the same machine as you are accessing the install wizard from, the URL will be http://localhost/owncloud, or https://localhost/owncloud if you have enabled SSL.
- If you are installing ownCloud on a different machine, you’ll have to access it by its hostname or IP address, e.g. http://example.com/owncloud.
- If you are using a self-signed certificate, you will be presented with a security warning about the issuer of the certificate not being trusted which you can ignore.
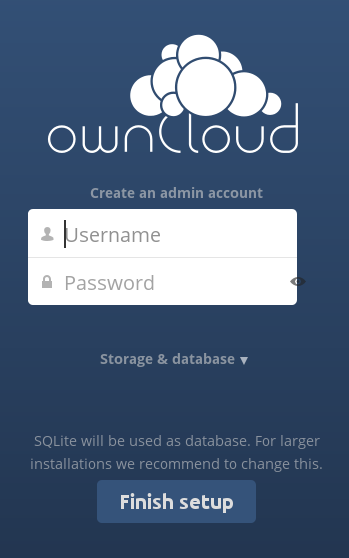
- You will be presented with the setup screen:

Required Settings
Under create an admin account you must enter a username and password for the administrative user account. You may choose any username and password that you want.
Storage & Database
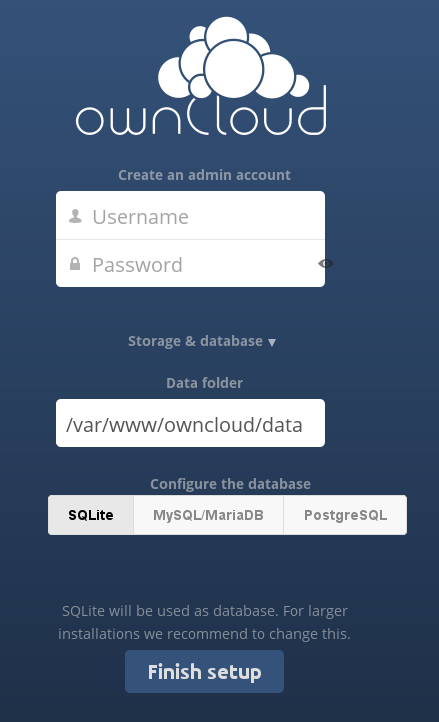
- Click Storage & Database to see all of your database options, and to optionally change the default data storage directory.
- The database you want to use must already be installed, and you must have a database admin user and password.
- Enter any arbitrary name for the Database name. This must be a database that does not already exist.
- If you are not using Apache as the web server, it is highly recommended to configure the data directory to a location outside of the document root. Otherwise all user data is potentially publicly visible!

Database Choice
- For a guideline on which database system to choose, and on pointers how to set them up for being available for PHP/ownCloud, see Database Configuration
- Note that you will only be able to choose among the PHP database connectors which are actually installed on the system.
- It is not easily possible to migrate to another database system once you have set up your ownCloud to use a specific one. So make sure to carefully consider which database system to use.
- When using MySQL/MariaDB or PostgreSQL you have two options regarding the database
name and user account you specify:
- You can specify either an admin or the root user, and the name of a database which does not yet exist. This lets ownCloud create its own database; it will also create a database user account with restricted rights (with the same username as you specified for the administrative user, plus an oc_ prefix) and will use that for all subsequent database access.
- There are restrictions as to what characters a database name may or may not contain; see the MySQL Schema Object Names documentation for details);
Finish Installation
- Once you’ve entered all settings, click “Finish Setup”
- ownCloud will set up your cloud according to the given settings
- When it’s finished, it will log you in as administrative user and present the “Welcome to ownCloud” screen.
Setting Strong Directory Permissions
For hardened security we recommend setting the permissions on your ownCloud directory as strictly as possible. This should be done immediately after the initial installation. Your HTTP user must own the config/, data/ and apps/ directories in your ownCloud directory so that you can configure ownCloud, create, modify and delete your data files, and install apps via the ownCloud Web interface.
You can find your HTTP user in your HTTP server configuration files. Or you can create a PHP page to find it for you. To do this, create a plain text file with a single line in it:
<?php echo exec('whoami'); ?>
Name it whoami.php and place it in your /var/www/html directory, and then open it in a Web browser, for example http://localhost/whoami.php. You should see a single line in your browser page with the HTTP user name.
- The HTTP user and group in Debian/Ubuntu is www-data.
- The HTTP user and group in Fedora/CentOS is apache.
- The HTTP user and group in Arch Linux is http.
- The HTTP user in openSUSE is wwwrun, and the HTTP group is www.
Note
When using an NFS mount for the data directory, do not change its ownership from the default. The simple act of mounting the drive will set proper permissions for ownCloud to write to the directory. Changing ownership as above could result in some issues if the NFS mount is lost.
The easy way to set the correct permissions is to copy and run this script. Replace the ocpath variable with the path to your ownCloud directory, and replace the htuser variable with your own HTTP user:
#!/bin/bash
ocpath='/var/www/owncloud'
htuser='www-data'

find ${ocpath}/ -type f -print0 | xargs -0 chmod 0640
find ${ocpath}/ -type d -print0 | xargs -0 chmod 0750

chown -R root:${htuser} ${ocpath}/
chown -R ${htuser}:${htuser} ${ocpath}/apps/
chown -R ${htuser}:${htuser} ${ocpath}/config/
chown -R ${htuser}:${htuser} ${ocpath}/data/

chown root:${htuser} ${ocpath}/.htaccess
chown root:${htuser} ${ocpath}/data/.htaccess

chmod 0644 ${ocpath}/.htaccess
chmod 0644 ${ocpath}/data/.htaccess
If you have customized your ownCloud installation and your filepaths are different than the standard installation, then modify this script accordingly.
This lists the recommended modes and ownership for your ownCloud directories and files:
- All files should be read-write for the file owner, read-only for the group owner, and zero for the world
- All directories should be executable (because directories always need the executable bit set), read-write for the directory owner, and read-only for the group owner
- The / directory should be owned by root:[HTTP user]
- The apps/ directory should be owned by [HTTP user]:[HTTP user]
- The config/ directory should be owned by [HTTP user]:[HTTP user]
- The data/ directory should be owned by [HTTP user]:[HTTP user]
- The [ocpath]/.htaccess file should be owned by root:[HTTP user]
- The data/.htaccess file should be owned by root:[HTTP user]
- Both .htaccess files are read-write file owner, read-only group and world
Trusted Domains
ownCloud will take the URL used to access the Installation Wizard and insert that into the config.php file for the trusted_domains setting. All needed domain names of the ownCloud server go into the trusted_domains setting. Users will only be able to log into ownCloud when they point their browsers to a domain name listed in the trusted_domains setting. An IPv4 address can be specified instead of a domain name. A typical configuration looks like this:
'trusted_domains' =>
  array (
   0 => 'localhost',
   1 => 'server1',
   2 => '192.168.1.50',
),
In the event that a load balancer is in place there will be no issues as long as it sends the correct X-Forwarded-Host header.
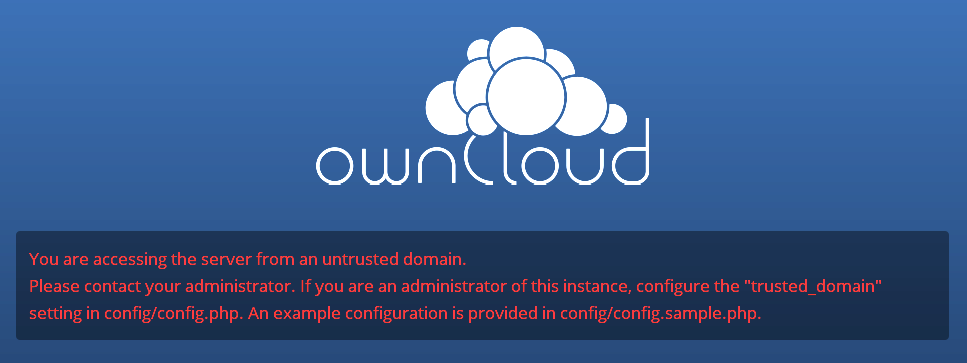
The loopback address, 127.0.0.1, is whitelisted and therefore users on the ownCloud server who access ownCloud with the loopback interface will be able to successfully login. In the event that an improper URL is used, the following error will appear:

For configuration examples, refer to the config/config.sample.php document.